THE QUICK ANSWER:
- Check if your decoder & Tv has power, have lights on, and are responding to their remotes.
- Check the white satellite cable connectors on both ends for security and connectivity.
- Check if the LNB is working.
- Are all channels dead, or only some?
- What are the signal strength and quality showing?
With the above in mind, I will in the following article, explain to you, in detail, how to step by step eliminate the probable causes of your problem.
Step 1: What are the first things to check?
- If only some channels are missing, chances are good that we might be experiencing “Rain-Fade”. This is a condition that can deteriorate the signal because of rain, either at your dish, at DStv in Randburg, or at the original broadcaster like BBC in the U.K. Be somewhat patient, by giving it time. Thunderstorms do not last that long, it will pass.
- Remember that all decoder types can be tested in the same way.
- Your decoder and Tv are switched on and you are seeing a large E48-32 error on the screen. This means that the decoder is not sensing a signal coming from your Dish/LNB. Seeing this error is a good indication that the decoder is in working condition.
- We have to keep in mind that an E48-32 error code can not be reset by the DStv Technical system, like other error codes. We will need to do faultfinding, logically eliminating some possible causes.
- Because the decoder has to supply power to the LNB via the coaxial cable, it should be kept in mind that that this 12/18 volt supply might still be interrupted somewhere.
- It might also be possible that the power, supplied by the black power supply, plugged into the wall socket, is not delivering enough power for the decoder to do all its tasks. (Even if its pilot light is on).
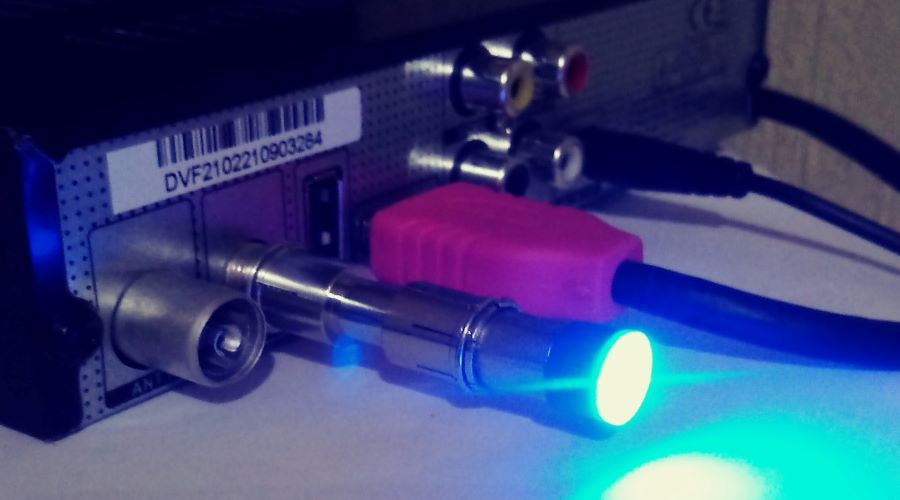
- The satellite dish input to the decoder ( marked LNB-in, Unicable or Universal) would be an ideal place to test for 12/18volt, if you happen to have a volt meter. The easy way would be to use the LNB Tester that is available for purchase on this site.
- This done, and getting a strong glow from the tester, will mean that the cable is good and we have to search further.
Step 2. How to find a DStv cable fault?
- Testing the cable is a straight forward process. We have to look at the end terminals, called F- connectors. These are very simple, and we just want to make sure that they make good contact, but do not make a short circuit. (Inner copper core touching the outer metal shielding.)
- Use a magnifying glass if not certain, because this fine braided mesh can some times be difficult to see. With the stainless steel F-connector removed from the cable you will notice that this connector has a screw thread on the inside, that makes it possible to screw it onto the cable.
- If the cable end seems untidy, cut it off, and rather redo it again, With a sharp knife cut off about 1.5 cm of the outer plastic. Then fold back the mesh and aluminum foil. Now cut of the white plastic around the core, so you only have 5mm of it remaining visible.
- Then screw the connector on to the cable until this white inner plastic is level with the visible flat surface on the inside of the connector. Cut the copper core off, 2mm above the threaded hexagonal part. Do this both behind the decoder, as well as at the dish/LNB.
- When outside, it is good to inspect the cable section that is exposed to direct sunlight, for the possibility of the protective plastic outer layer being cracked. This can absorb water and cause a short circuit.
- If a part of your cable is damaged, it is not required to replace the whole cable but only the damaged section, by using a proper cable joiner and moisture repelling tape.
- You can once again at the dish, test if there is any 12/18v current in the cable, with the LNB Tester.

- Pictured is a easy to use cable tester. As soon as you connect it to the back of your decoder or on the cable at the dish, it will light up, indicating excellent continuity.
- If no electrical current can be measured, it means that there is a damaged spot in the cable that you will need to identify by following the cable route, to see if the cable was not pinched or bitten by a rat or dog. A high quality cable joiner will solve such a weak spot.
- Cables are generally rugged, and if kept out of water and sunlight, will last many years.
- DStv has lately made installations very simple. so that there is only one cable running from the dish to each decoder, even if you have three decoders. There are no other components between the dish and any decoder.
| The mini Cable & LNB tester in now available to order. You can just click on This Link to take you to the sales page for instructions. |
Step 3. How to check your LNB on a DStv?
- No picture yet ? Then it is time to see how the LNB is performing. First thing to do is to check the LNB outer surface for UV/sun damage. If the plastic cover facing the dish is cracked, then water could have entered the LNB damaging it permanently. This will require replacement.
- The second thing you have to look out for, is the condition of the LNB holder. The LNB should be locked solidly, without any possible movement, because the angle at which the LNB is mounted is absolutely critical for good reception.
- A qualified installer would have, on installation, locked all bolts on the dish in such a way, that any movement is not possible, so check the LNB holder for any cracks or broken parts.
- There is no way to test the LNB a 100%, other than what is described in step 4, unless you have a professional signal meter.
- The theory is, that if the LNB is getting power, it should work by giving you a picture. The availability of LNB Power can be tested with a Mini LNB/Cable tester. See picture above.
- Remember, that if your decoder is showing you even a weak signal strength (Blue lines of even 15 or 20%), the chances are good that the LNB is in working condition.
- My advice here is to always keep a spare new LNB to replace to old one if in doubt.
- If all is well, let us investigate further:
Step 4. Can the decoder help me fault-find?
- If we find that we have some channels, we at least know that the LNB is working, compared to no channels and a possible broken LNB.
- With everything reconnected, let us take the remote control, and see if we can monitor the signal strength.
- Explora decoders have 3 tuners. If tuner 1 gives no channels to watch, but tuner 2(Recordings) & tuner 3 (Data) gives a strong signal, the fault could be with the decoder. Have it tested at the DStv Agent.
- Here you will find that the older decoders have a different remote sequence than the latest models, but usually proceeding with: menu – Information central, information central again, then no 4/or signal status. I will focus here only on the HD (Zapper) & Explora Decoders.
- Select channel 100, then press the help button – General information – then Tuner status. This screen will give you two blue bars. This first one shows signal strength. (Not very important – decoder will work fine on a reading above 20%). The second bar shows the signal quality, that is to be above 60%, preferably 90%+.
- If there is no signal, chances are good that the LNB has failed. If there is a weak signal, the LNB seems good, but the dish might be out of alignment. If the signal improves by applying slight pressure on one side of the dish, then alignment is surely the problem.
- This can be fixed by slightly loosening the adjustment bolts and with tiny movement try to improve the strength. Do East West first, then North-South. (up-down). Remember to tighten all bolts when done.
- Whether you replaced the LNB or adjusted the alignment, the last crucial action is to set the LNB angle (known to as the Skew). This is done by rotating the LNB in its holder bracket, by first slightly loosening one of the screws holding it down.
- Viewing the dish from the front, the cable connection should be in the four o’ clock position. Small tweaks clock- or anti- clockwise should bring up the signal quality to its maximum.
Step 5. Does trees affect DStv reception?

- If by now the signal quality is not yet above 60% we will have to look at other causes.
- One of the most common causes is obstruction. Here we have to keep a few facts in mind. Firstly your dish gets its signal 36 Degrees up from horizontal.
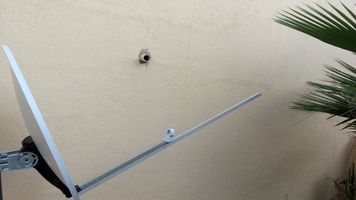
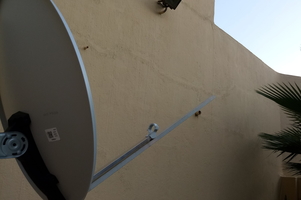
- Positioning yourself behind the dish and looking up along the LNB arm, and extending an imaginary line into the sky, there should be no obstructions, like tree branches, above this line. Imagine a two meter wide tube going up in the sky with nothing in it’s way.
- Palm trees are a big culprit in this regard. If anything is obstructing this view, you should get your tree saw and ladder, and rectify the problem. If the task looks too daunting, I would advise to get a professional tree feller, satellite installer to move the dish to another location.
- It is also possible that the original installation was done with a too short dish bracket, causing the roofs eve to be in the way of the signal trying to reach your dish.

Resolution:
- Chances are great that during the above steps your problem has been resolved. We have to however keep in mind that we are interacting here with a device that is software driven, and if this has been corrupted by for instance a power surge, the decoder may react inconsistently with all the known rules.
- If the decoder for instance has been without a signal from the dish for a number of days or weeks, it might not be able to boot up sufficiently in order to display the required menus for you do do some of the above actions.
- This might be the appropriate sign that we require professional help.
- It is my conviction that it remains worth your while to always try and solve easy to check problem points on a household device like your DStv system. It not only saves you money, but the satisfaction of achieving success with such a repair is also a wonderful feeling.
