With modern flat-screen televisions not having enough internal space for larger speakers, we find that the sound quality is extremely poor especially when listening to music or during some action movies. This leaves room for some real improvement in order to make these events more enjoyable. Here follows some tips on exactly how to do this, without it having to cost you too much.
Ways to achieve audio improvement:

Professional HiFi installers have very good, but complicated ways to connect up sound systems. These are then also much more complicated to operate as well, with many remotes that need to be used correctly to get a specific result. Here I want to show you the most practical ways to connect up your Sound and Tv so that you not only have great sound quality, but everyone in the family should easily be able to operate it.
| 1. Connecting a Sound Bar to your Television or Projector. |
| 2. Connecting a Sound Bar to your Satellite decode |
| 3. Connecting a Sound Bar together with a Sub-Woofer. |
| 4. Connecting a Mini Hi-Fi. |
| 5. Integrating you television with your existing Sound System. |
| 6. Integrating your Tv with your Surround Sound System / Home Theater. |
| 7. Connecting you Wireless Headphones to your Tv. |
STEP 1: Decide what type of audio quality Profile do you fit into.
Personality wise we all differ from one another in the way we perceive sound around us. 1. Some people feel things like music emotionally with their hearts. 2. Others purely listen to it as a whole with their ears. 3. You then also get the ones who naturally tend to listen not only to the music as a whole, but who’s brains are wired in such a way, to be able to hear every instrument and voice separately and vary the volume of separate instruments independently.
| 1. Emotional feeling listener; | It can be worth your while spending some money on sound improvement, with good quality sound equipment in the middle price range. |
| 2. Whole audible experiencer; | Most Tv’s and mini sound systems will meet your requirement. Why spend money on something you will hardly ever use, unless you need some volume for a party. |
| 3. The connoisseur wanting to hear everything; | Any money spent in this area will be money well spent. Buy the best that you can afford, you will get long term value from it. |
STEP 2. Decide what hardware will suit you best:
- If you fit into group 1 you should get good value from a Mid-range Sound Bar with or without a Sub-Woofer. A small to medium size audio amplifier with shelf speakers should also work well.
- Group 2 should get satisfactory sound quality and volume from a basic model Sound Bar.
- Group 3 will get more value by shopping for the best sound system that they can find. A high end Sound Bar with a Sub Woofer will go a long way, but real high fidelity from a quality amplifier with loose standing speakers will deliver the best “Movie theater” reproduction.
The advantages of a Sound Bar:
- This device is neat and compact, and fits neatly below the Television .
- Wires are all hidden behind the Tv with a pleasing appearance with no trunking required.
- Some come with Sub Woofers that operate tirelessly via blue tooth, that can be placed anywhere in the room.
The advantages of a dedicated High Fidelity sound system:
- You do get the best reproduced sound that is possible.
- You have a wider choice in sound adjustment of Treble and Base.
- You get not only stereo, but surround sound with true sound effects. Remember that this is simulated when using a sound bar.
- Even when using it for quadraphonic playback, you get a much fuller and rich sound with the feeling if being in the concert hall yourself.
- Hiding speaker wires could be a draw back, but blue tooth models are becoming more available lately.
The advantages of high quality wireless Headphones.
- With neighbors sometimes being very close, it gives you the opportunity to listen to music or TV without disturbing others.
- These sets give excellent quality reproduction and do not need to cost an arm and a leg.
- With two people listening to the same soundtrack and each having their own headset, gives them the freedom of listening at different volume levels that is comfortable to them.
- You can even go to make some coffee downstairs in the kitchen without missing a beat.
- The batteries are rechargeable and last much longer that most people need.
- I found the FM models to work best for me, especially with battery life. You also get Bluetooth- and Infra red models.
STEP 3. How to connect these systems the easy D.I.Y way:
** This is the part that most people fear. Please be at ease, because I will show you by means a simple diagram below, which connection points to expect to find behind your TV and sound equipment and how to master them like a pro.
First you have to know how to choose the best connectors & cables:
| 1. HDMI: Audio & Video. | The best current HD option with all digital characteristics for Audio & Video. |
| 2. OPTICAL: Audio only. | Best option for AUDIO including features like Surround & Dolby. |
| 3. DIGITAL. Audio only. | Very much on Parr with Optical. |
| 4. WIRELESS – BLUETOOTH: | Blue tooth also has the advantage of having no wires for easy speaker placement. |
| 5. COMPONENT (RGB) Video: | This option gives you something between Standard def. and High Definition. |
| 6. RCA Video & Audio. | High quality SD analogue reproduction. |
| 7. 3.5 mm Mini Jack: Audio. | Analogue reproduction. |
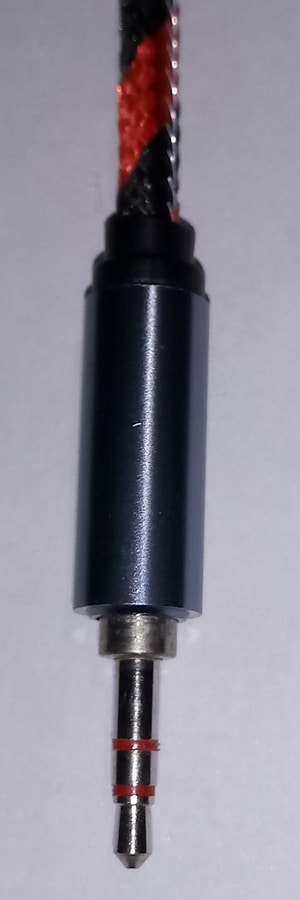
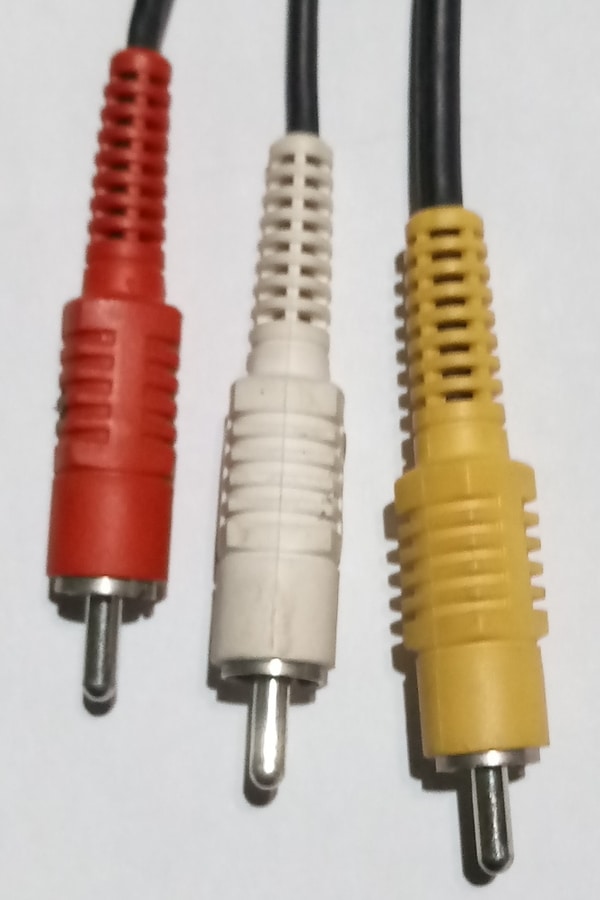

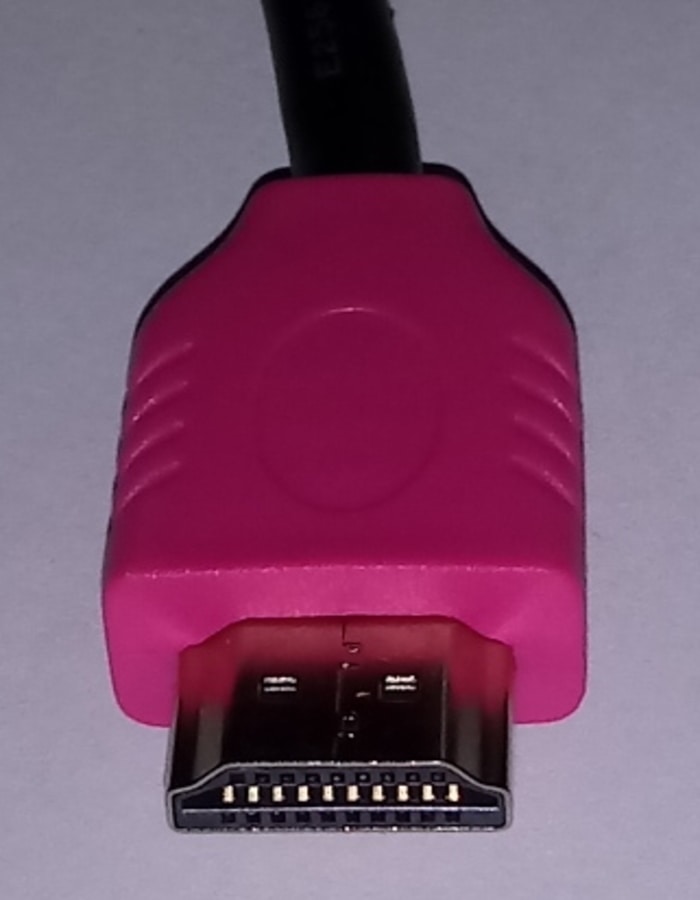
Healthy rules to follow:
- Here, the desired route is to use the best connections for the Devices that you use most.
- Remember that only Audio needs to go to the Sound Bar.
- Have Power OFF on all devices during connection and disconnection to protect the delicate circuitry. (HDMI cables).
- Just match the input and output connector using the same color, or in other cases take the output to the similar input.
Step 4: What do the connector sockets look like – here are some examples:
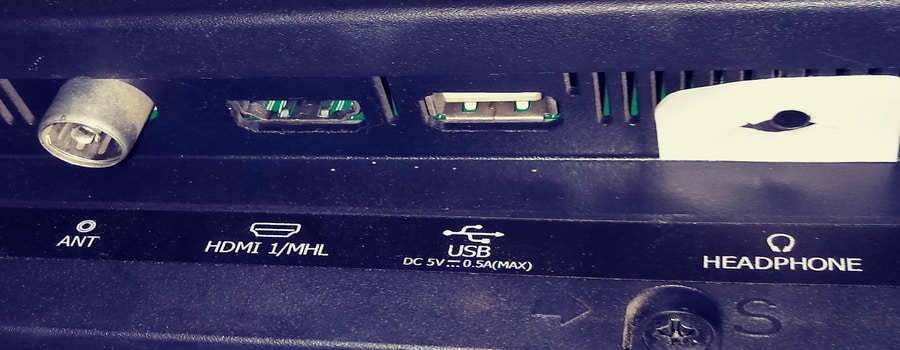
- On the left you have a std. Tv connector (DvB-T2) for signals from a Terrestrial antenna.
- To it’s right we have the HDMI-1 input into the TV.
- Then follows the USB connector to input Data like Photos directly into your TV.
- Then on the far right is the 3,5mm Headphone Output Jack that could also feed your sound bar.

- Far left you see a test point used for technicians servicing the TV.
- To the right of it you see the Optical out connector with a black dust-cover to keep it clean.
- To the right of that we have a LAN input (RJ45) in case you choose to use a cable in stead of WiFi for your internet connection.
- Then follows HDMI connector 2 and 3 for input of more devices to your TV.
- Lastly on the right we have a combination input for either Component or AV (RCA).
- On the above Television set you therefor have inputs for 4 High Definition devices like Satellite, DVD, PlayStation and Media Box.
- It does not have an HDMI-Out so one will need to use the Optical out to your Sound Bar or HiFi.
- To feed your FM Wireless Headphones you can the use the 3,5 mm Aux. Jack for a great stereo reproduction.
STEP 5. An easy diagram to show you the basic way:
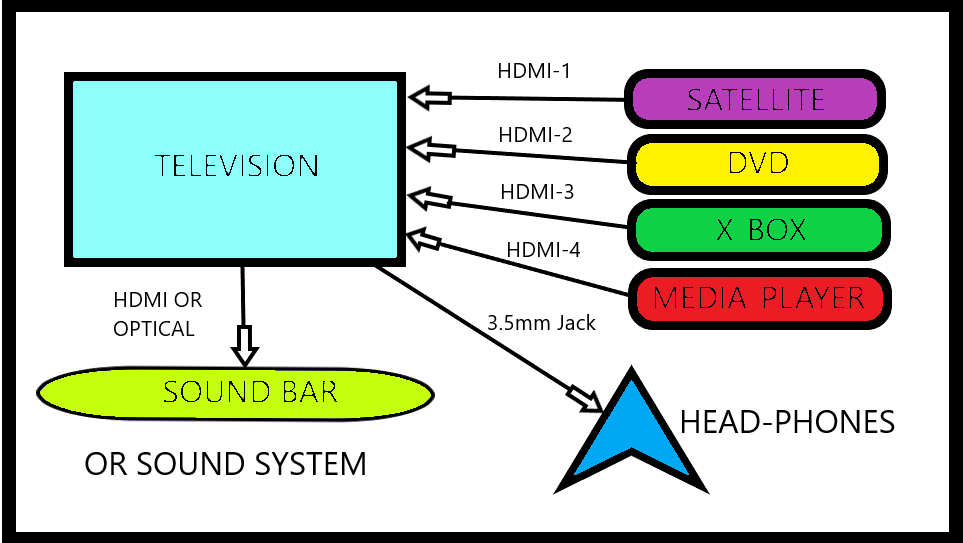
- This diagram will work without fail every time.
- You will get excellent picture quality as well as beautiful sound.
- This is simple, but effective.
- You can operate it with one remote.
- Even children will find it easy to manipulate.
STEP 5. How to approach the connections behind a Audio Amplifier:
- Here follows a picture of a 10 year old Mini HiFi, showing the connector types:
- A large Surround sound Amplifier will have the same type of connections, just more in quantity to input more devices.
- With Televisions having plenty inputs, these Amplifier inputs are now not needed anymore.
- You will notice that this Mini Amp does not yet have an HDMI-out for HD video to the TV, but it has a VGA and a Composite connection (RGB) that will do the job well enough.
- With this model you will have to use the Audio inputs: PC or TAPE with an RCA cable. Your sound improvement compared to that which you get from the small speakers of a Flat-screen Tv, will be far superior.

STEP 5. Connector types:
- I have mentioned the Blue VGA output that can feed to a monitor.
- The Audio out RCA connectors at the top will receive stereo audio with \Dolby from your Television.
- Although in this case used as outputs, you see at the top left your standard RCA connectors:
- Red = audio right.
- White = audio left.
- Yellow = Video (in analogue).
- To the left of the yellow RCA you see a Mini Din connector called: S-Video. These are not used anymore.
- Below that we see a RED, BLUE and GREEN connector called: a Component connection. It gives you the three basic color spectrum ranges for Video before HDMI was developed.
- Next to the green connector you will see an Orange one called COAXIAL. This delivers a high quality Audio signal close to the quality of Optical Fiber. This can alternatively be used to take audio from your Tv to a Sound Amplifier.
Conclusion:
- I hope that this information will help you get great audio from that “jam-tin” sounding Tv that has been irritating you for ages.
- As you can see, you can get great results from using your old sound amplifier or even one from a secondhand store.
- May there be peace and love in your family after your Audio D.I.Y project.
