If you have had Load-shedding or lightning, you might now experience no picture, with an error code indicating “No Signal” (E48 in the case of DStv). Other broadcasters decoders will show something similar.
Here follows some easy tips to quickly resolve the LNB problem yourself, without needing expensive field-strength meters or tools.
Step 1: Testing your LNB for functionality.
- When discovering this problem you will be in front of the decoder and might as well start the process right there. (Firstly confirming functionality of you tester).
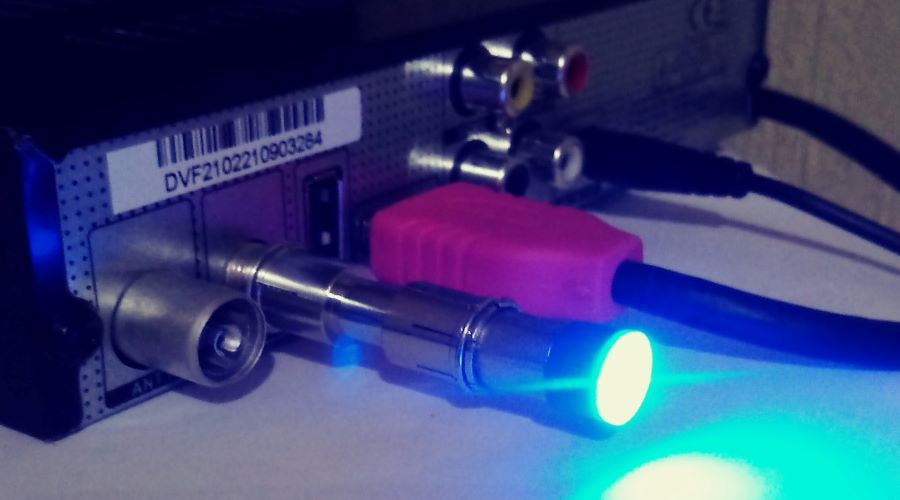
- Using our handy Cable/LNB tester, you can connect it to the LNB/SatCr/Unicable connector behind the decoder.
- The decoder is supposed to send power to the LNB for it to amplify your signal back to the decoder.
- If your Mini Tester lights up, then you know that the decoder is doing it’s job.
- Now you can go directly to the LNB and connect your mini tester onto the LNB cable.
- If it lights up strongly, then we know the cable is sending the power to the LNB.
- This will inevitably indicate that your LNB is dead.
- Replacing & adjusting your LNB is described here:https://sat-tv-diy.com/wp-admin/post.php?post=61&action=edit
- If however you get no indication of power at the LNB, will mean that your cable is broken somewhere between the LNB and the decoder.
- Remember that your LNB is unable to function without power coming from the decoder.

Step 2: Testing your cable for a break, weak-spot, or short.
- It will be best to start at the LNB, by following the cable slowly back to the Decoder inside the house.
- Look out for sections of your cable that are situated in direct sunlight, that could cause it to crack open the outer plastic layer letting water in.
- This water can in fact travel right down to the decoder damaging the connector behind the decoder.
- Rather replace sun-damaged sections of cable.
- Use a torch or flash-light to see in any dark areas.
- Look out for any cable joiners that have been put in to the cable.
- These are usually the culprits, especially if they get wet.
- When you find one, dismantle it, and inspect it for its condition.
- Then put your mini-tester on the end that goes to the decoder.
- It should lite-up. If not, continue the search.
- If you have found and tested all cable joints, and still get no power through, then there might be a chance that the cable is pinched somewhere, causing a short between the mesh & the copper center.
- These cables are very rugged and do not break easily.
- If you find a spot in the cable that might have been pinched between a roof beam and a tile, or two bricks, you can repair it by cutting out the bad spot and connecting it with a cable joiner.
At this stage your problem point will have been discovered and solved, so it is time for something cool and refreshing as a reward.
Testing for power to your TV-LINK:
If you have one of the older type decoders that has an RF-out connector whereby one can connect a second Tv, this tool comes in handy when you find that you can no longer change channels at the second Television:
- Testing that you have 9volts, to power your Tv-Link, or Tv-link splitter.
- The tv-link will cause a snowy picture on tv-2 without any power.
- It will also not change the channels.
- You can follow a similar method of testing for power as described in testing the LNB cable, starting at the decoders RF-out connector.
- As soon as you find the weak spot in the cable, not only will the tester light-up. The Tv-link’s LED will also now light-up brightly.
The Mini LNB/Cable Tester Features:
With this little handy testing device nearby, you have the following benefits:
| 1 | The tester is small and has a long life LED Globe. |
| 2 | It is easy and simple to use. No specialized knowledge required. |
| 3 | It does not require batteries. |
| 4 | You can store it by sticking it to the back of the decoder with prestik. |
| 5 | It is very cheap. |
| The Mini LNB & CABLE Tester is now available for purchase. By clicking on this link it will take you to our sales page for detailed instructions. |
